Home | How-To's / Other Home | MultiMC How-To | Rei's Minimap How-To | Epic Colonizer Setup How-To | Epic Colonizer 2 Setup How-To | Twitch Launcher How-To | Vanilla Launcher Profile How-To
This is a long but easy to follow how-to on getting a new profile in the vanilla launcher.
Please be patient while this page loads the images.
THIS GUIDE MAY BECOME OUTDATED IF VANILLA LAUNCHER CHANGES STUFF! BEWARE!
This guide illustrates how to add a separate profile for version 1.12.2 vanilla.
Sorry if the screenshots are kinda big, you can use CTRL- to zoom out, and CTRL+ or CTRL= to zoom in.
It might be easier to use the page up and page down keys to scroll.
I tried the page on my phone and it did a decent enough job of changing the text size compared to the pictures lol.
To begin, open the vanilla launcher.
Next, click on the three-dashes button in the upper right.
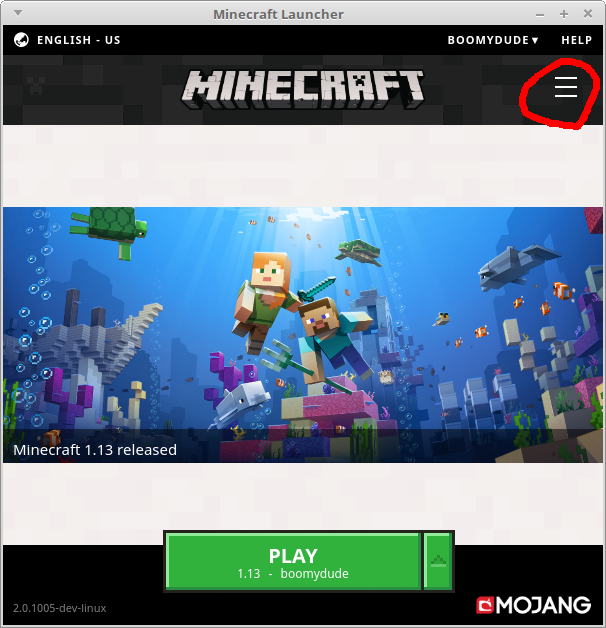
Next, click on "Launch Options".
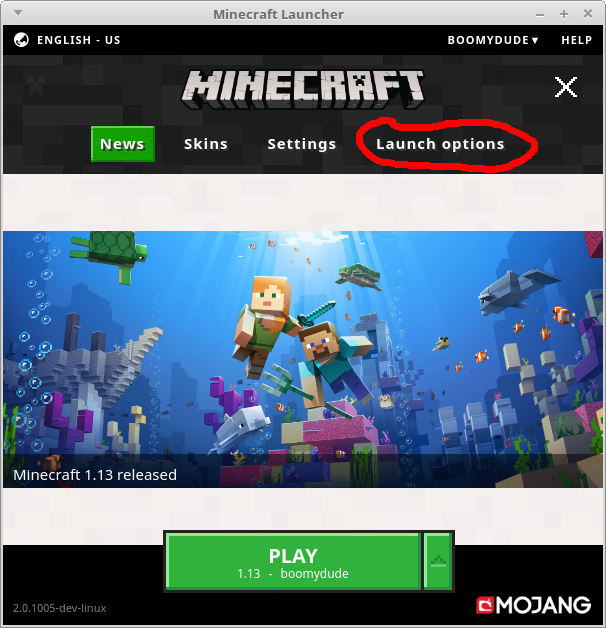
Click on "Add New".
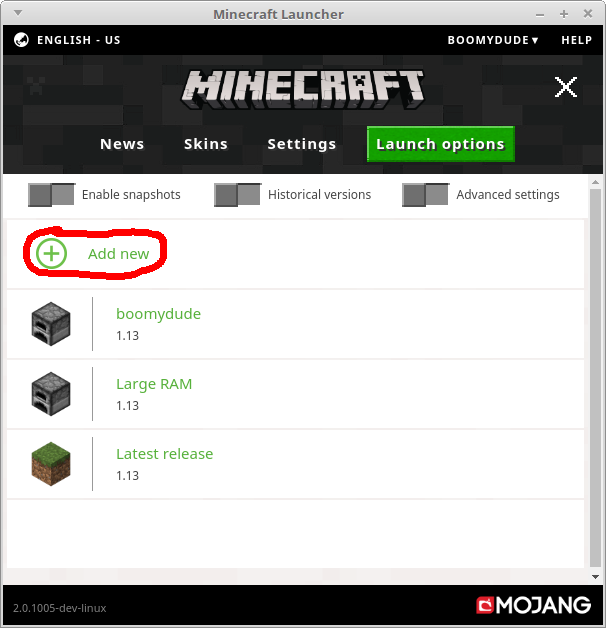
Give your profile a name in the "Name" box.
Next, click the drop-down menu and select version 1.12.2
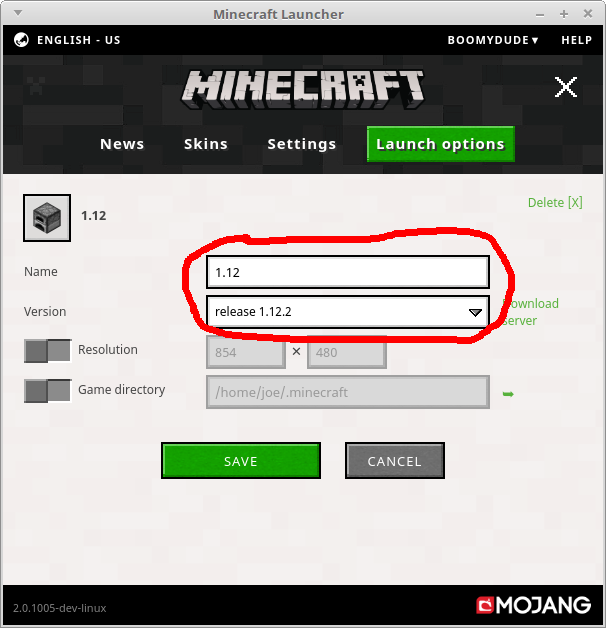
Optional but recommended: Click on the "Game directory" slider, and type a separate path. This way you can keep resource packs and client mods completely separated between 1.12 and 1.13
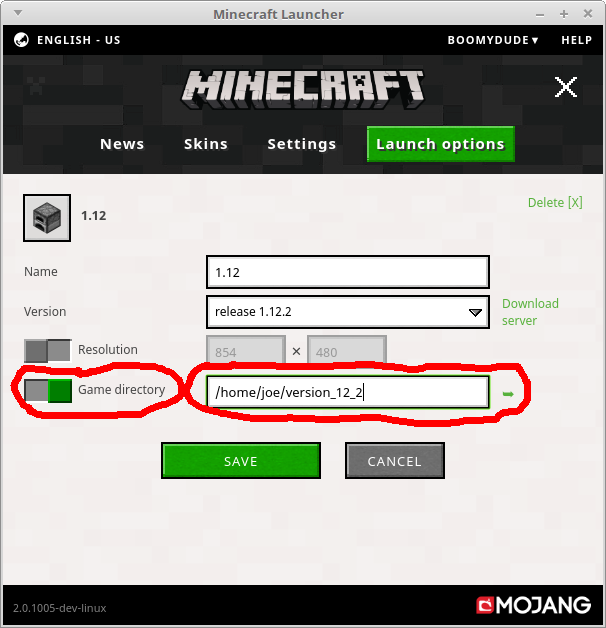
Click the save button.
You should now see the new version profile listed.
Now click the "News" text/button.
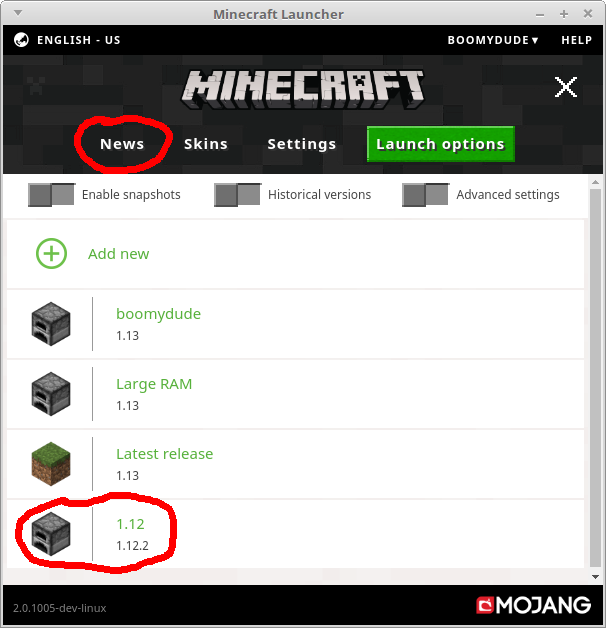
You are now back at the home screen of the launcher.
Check that the profile is the one you want. If not, click the up-arrow, and select the right profile.
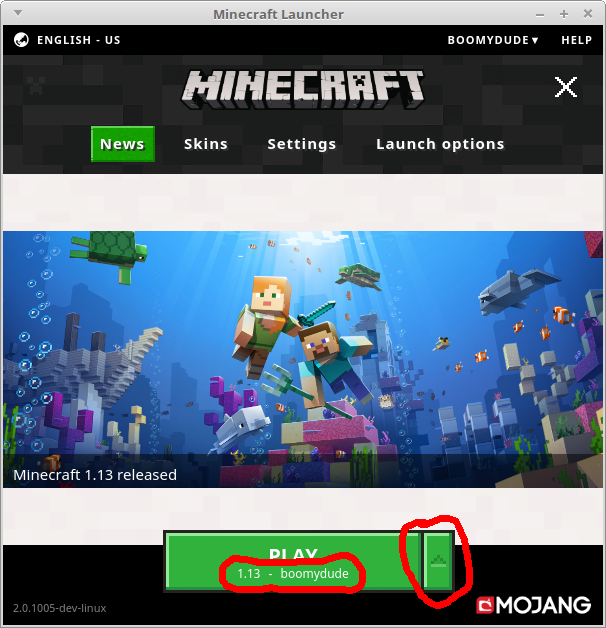
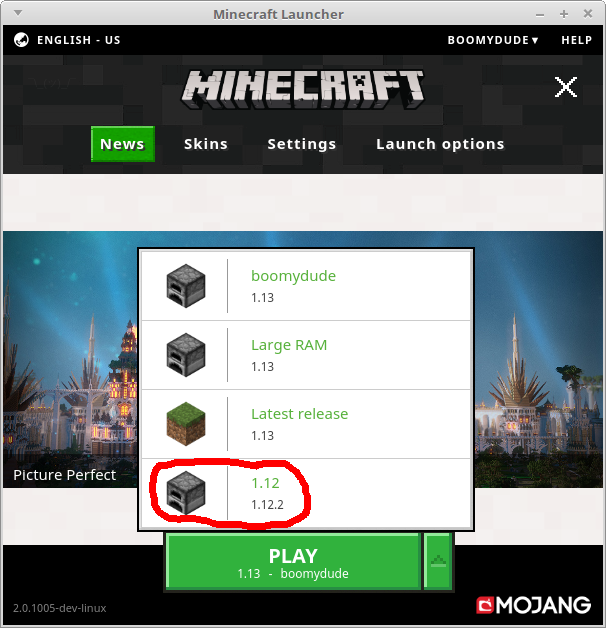
You should be all set. Click play.